
Rise of the tape springs Part 2
- mrgboucher
- Sep 20, 2021
- 4 min read
Hej Hej everyone, my name is Leon Messmer, I am an exchange student from the University of Bristol and I joined the B2D2 team 3 weeks ago!
I am working on the tape springs manufacturing and testing. I will tell you a few interesting facts about them.
First let’s start with a small reminder. The tape springs are basically the heart of the boom deployment mechanism and connect the three plates together.
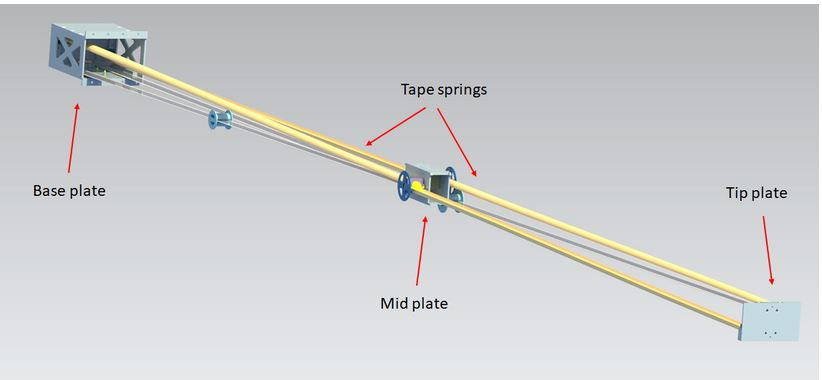
Boom deployment mechanism with the tape springs (yellow)
The tape springs are called bi-stable because they have two stable states, coiled and uncoiled. In a coiled state, they have stored energy that they want to release. If they are in between stable states, they have the tendency to reach the lower energy state, which is uncoiled. Taking advantage of that trait, the tape springs are used as a release mechanism by attaching one end of the tape spring on each plate. When they start uncoiling, they will move the plates away from each other, as in the picture above.
In a previous article we explained how we had manufactured the tape springs on a small case, for 250mm samples. Today we will talk about the full 1m long version.
Our tape springs are made out of several layers of glass fibre epoxy prepreg which is a composite material. This means that the material is made out of fibres and a so-called matrix, which is basically the glue that holds the fibres together. By having several layers with different fibre orientations on top of each other, we achieve better mechanical properties and get a so-called laminate. You can have an idea of the structure from the picture below.

The four layers of the tape springs
The prepreg is basically like a tape, the fibres are in there with the right amount of matrix. The prepreg tape is then cut into adequate strips to fit the dimensions of our tape springs. Here you can see a picture of the prepared prepreg strips.
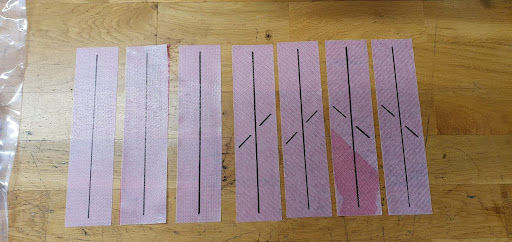
Prepared prepreg strips
They are then carefully laid on top of a mould to achieve the final form. We are using 7 layers of glass fibre. It is crucial to make sure that there are no wrinkles in between layers as this could strongly affect the performance of the tape springs.
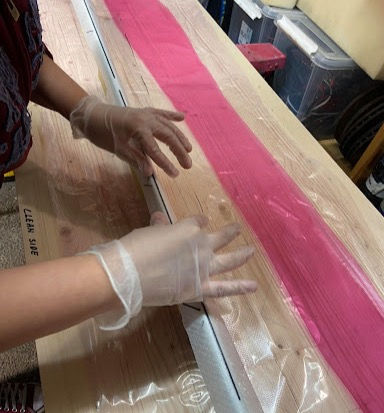
Layers being laid on top of the mould
Once all layers are put on top of the mould, an additional layer of material is put above the prepreg to assure a good surface finish. For this layer (in red in the picture below), three different manufacturing approaches were tested. Let us discuss the different results we managed to achieve with the different approaches.

The different layers on top of the Prepreg
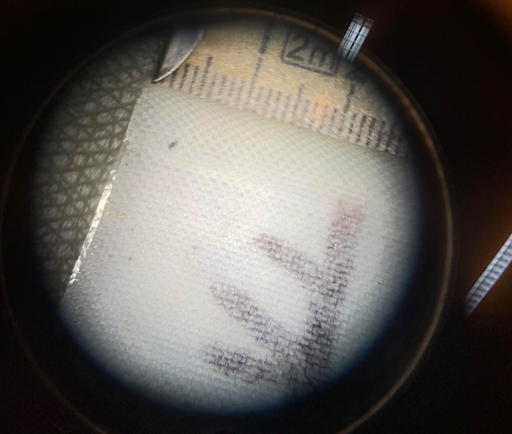
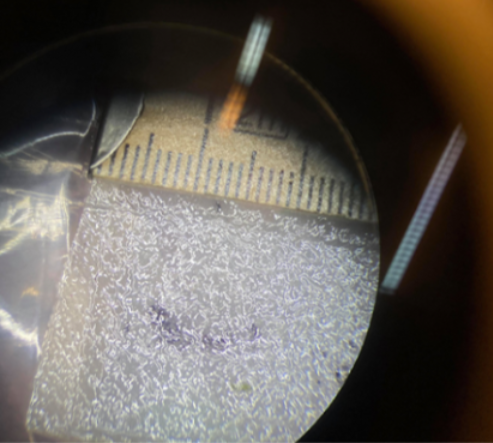
1rst approach: vacuum film
For the first approach, a vacuum film is laid above the prepreg. In theory, this approach should yield a smooth surface finish characteristic of composite materials. However in our case, under the microscope air bubbles in the resin and veins could be observed.

Vacuum film approach result
This issue could probably be solved by using a stronger vacuum pump but more to that later.
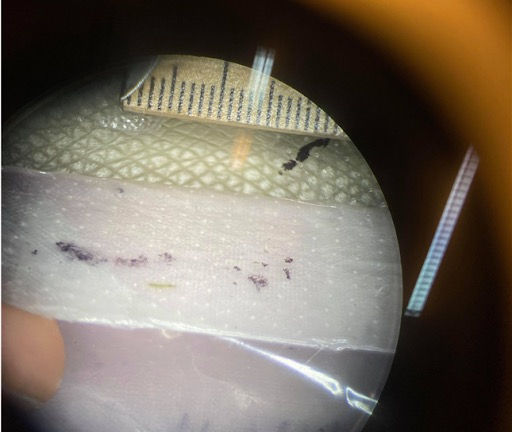
2nd approach: Peel ply
The second approach uses peel ply as a layer above the prepreg. This enables the excess resin to escape at any point. As the peel ply is similar to some sort of fabric, it absorbs all of the excess resin. Under the microscope, it can be seen that the fibres are nearly completely exposed. This makes the surface slightly rough which could cause issues while deploying.
Peel ply approach result
3rd approach: Perforated vacuum film
The last approach which was tested, was to put a perforated vacuum film onto the prepreg. This is basically a film similar to the first approach. The only difference is that it has lots of small holes which enable the excess resin and air to escape.
Under the microscope, it could be observed that lots of small wrinkles were formed as well as little dots were present on the surface finish due to the little holes in the film. This again could cause issues while deploying. It is suspected that the little resin veins are formed due to this film being much thinner than the other ones. This means that it is more susceptible to wrinkles.
Perforated vacuum film approach result
Next steps
The entire mould is then put in a vacuum bag. This is a bag made out of foil with a vacuum valve through which air will be sucked out. By doing so the composite layers are evenly pressed onto the mould and the excess matrix will escape the material. So far we have reached a vacuum of 0.4 bar, however our team has just received a new vacuum pump which shall be able to achieve a vacuum of 0.8 pascal. This means the vacuum strength will be drastically improved.

After the desired vacuum is achieved, the vacuum bag will be put into an oven to cure. The curing process is what makes the glue go hard and gives the tape spring its structural integrity. The vacuum bag is kept in the oven at 70°C over 12 hours to assure that all the glue is hardened.
At the end of this time the mould is taken out of the oven and the vacuum bag and films are removed. Now we can see a smooth and homogeneous surface on our tape spring.
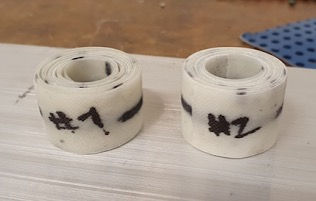
The last step is to cut off the corners and voila we have our functional tape spring.

Uncoiled tape springs
Coiled tape springs
So far the best approach was definitely the peel ply approach as there are just no wrinkles in the tape spring and a homogeneous surface finish was achieved.
The new vacuum pump will definitely strongly affect the results again and new samples will be produced. We will keep experimenting with different approaches and cycles to achieve the best surface finish and the best quality of tape springs.
This is it from me for today, I wish you all a beautiful weekend and see you next time! Make sure to also check out our Instagram, Facebook group and website.
Leon Out!


Comments